The Dreamworks Animation team use the same stages of production as Pixar when making a film.
I suppose its a worldwide standard technique that is used to create CG Films.

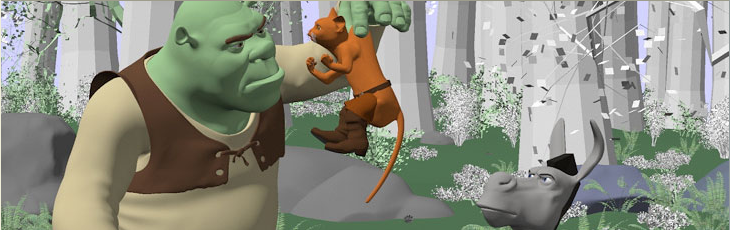
Every aspect of this picture above was created by computer, every blade of grass, every leaf, every strand of fur and every ray of light. A lot of hard work and sleepless nights go into an animated film and this is why it can take over four years to make one.
Stages of Production
Development:
Script
Films start off with ideas and concepts. Some of these ideas can be completely original or some ideas can be drawn from various things, things like childrens fairy tales, songs, films from the past, childhood memories and many more. Once an idea has been settled upon a script needs to be written, this is the blueprint for the film and gives everyone a view of what will happen.

This is a picture of the script from the film ‘Shrek’.
Storyboards
When a script is prepared and ready it is handed to the studios Storyboard Artists this can be a fairly hard job as they have to translate these words into pictures. They do this by making a series of sketches to bring the story to life. This has similarities to a comic book. There could be hundreds and thousands of storyboards drawn through the pipeline.
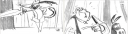
This is a picture of a storyboard from the film ‘Shrek’.
Visual Development
Once the script and storyboards are set the studios Visual Development Department plans how the film will look. The department develops the look and feel to each and every sequence. Everything in the entire film has to be designed, this can range from the main characters to the most minuscule prop. This stage consists of drawings, sculptures paintings and blueprints. All are a form of concept art.

Concept art from Madagascar.
Casting
Once the studio has the storyboards and characters designed and ready to go voices are needed to record the characters lines in the film. Casting for animated movies is very different from casting for live films as the studio pick the actor from the way they sound rather than the way they look. The studio will record the actors before they start to animate and will sometimes videotape the recording sessions making sure they capture key expressions and reactions.

Picture of an actor recording sound for animated film ‘Madagascar’
Pre-Production:
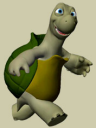
Modeling
From the initial character designs the studios Modelers will create a 3D model that will later be used for planning and animation. This modeling can be created in programs such as 3D Studio Max and other programs.
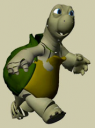
Model of character from ‘Madagascar’
Rigging
The modelers will start with an armature, this is a wire frame around the characters model. Armatures break down the character models into workable geometry thus allowing the modelers to give the animator the ability to move the 3D figure in any way they want. This is called ‘rigging’
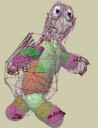
This is an image of the above model with an armature on it.
Basic Surfaces
Once the armature has been set up the studio adds basic surfaces to the character. This is the state the studio needs the character to be in for their next step.
Model above with basic surfaces added.
Layout
This step is down to the studios Layout Artists, they use rough renditions of the characters to put together the movement of the character(s) in the scene(s). This layout stage is where the studio draw the blueprint from where they get the camera movements, character placements, spacing, lighting, geography and scene timing. (A good example of this, which you should all remember was when Mike showed us the video of how the movie ‘Antz’ was made. It had a clip where the antz were moving in a limited way and it looked very basic. This was the layout stage.)

Layout stage from the film ‘Shrek 2’
Production:
Character Animation
Once the Layout Artists have everything working well in the layout stage they can then hand it over to the Animators. The animators will start bringing the characters to life using lots of controls that were created in the character rigging phase, they also synchronise the characters to the voice recordings. The characters look pretty impressive at this stage but not as impressive as they will when completely finished.

This is an image of the Character Animation stage from ‘Shrek 2’
Effects
After the character animation stage the next step is adding lighting and visual effects. With live films it is fairly easy to capture such things like nature and peoples expressions but in the computer animation industry these all have to be designed and created by the Effects Artists. The effects artists start with what the character animators gave them and turn it into something special.
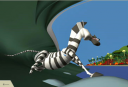
This is an image of a roughly animated character from the film ‘Madagascar’
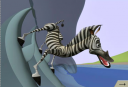
What the effects artists do next is add basic effects to the scene like the transparency effect in the water, like in the picture above.
Next the effects artists will add further, more detailed effects onto the scene. In the picture above you can see how there are reflections and shadows in the water. All of these are made by the computer.
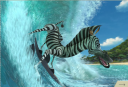
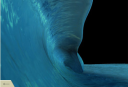
Then the effects artists complete the scene with even more effects. The artists add foam to the surface of the water which is a realistic effect when waves occur in the sea and they also add bubbles under the surface. They then finish it off by adding spray and splashes to the water. When all the elements have been composited it is then sent to the Lighting Department for the final textures.
Post-Production:
Finishing Touches
The end of the process is here and the studio is now ready to add the sound effects, add the final score into the film, mix the soundtracks correct the colour and release the film worldwide.Summary
As you can see the production pipeline for Dreamworks Animation Studio doesnt differ that much from the Pixar Studio. This is mainly because big animation studios have techniques that are used worldwide. I believe the only thing that would differ between studios is the people they employ and the skills and personal techniques the employees use when making a film. I believe it would take each studio the same amount of time and same processes.
Making a film is like people following a recipe to cook a meal, they would each have to follow the same recipe but some people would add their own personal preferences.
Thats just my hypothesis though. =|
Filed under: CG Pipeline Research | Tagged: 3D, Adam keigher, Animation, Computer Graphics, Dreamworks, Pipeline | Leave a comment »